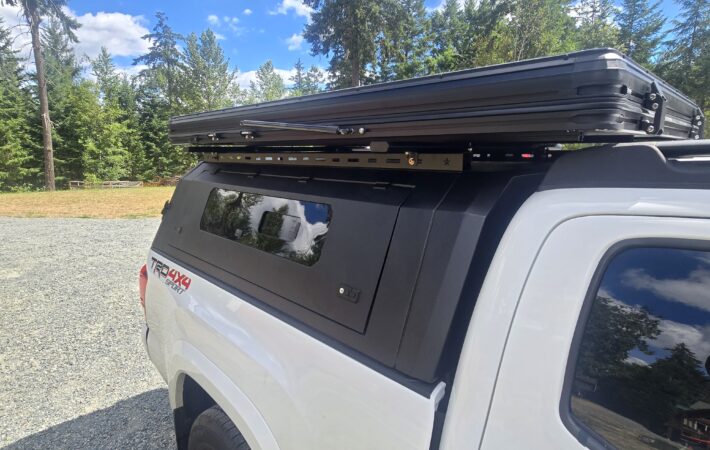


Talk to any experienced overlander about what really makes or breaks a trip, and the answer is rarely the terrain. It’s dinner. A camp kitchen that’s dialed in means hot meals, quick cleanup, and more time actually enjoying the trip. A camp kitchen that isn’t means rummaging through three totes in the dark looking for a can opener while everyone else has already eaten.
For Canadian overlanders running an aluminum canopy, a rooftop tent, or both, the camp kitchen is one of the most-used systems on the whole rig. It gets touched every day of a trip, sometimes several times a day, which means it deserves more planning than “toss a stove and a cooler in the back and sort it out later.”
This guide breaks down how to build a camp kitchen that actually holds up to real trips, real weather, and real Canadian conditions, whether you’re headed through the Kootenays or along the Cabot Trail.
Start With How You Actually Cook, Not How You Think You Should
Before picking up a single drawer system or storage bin, it helps to be honest about your own habits on the road. Some travelers cook full meals every night. Others rotate through the same three go-to dishes and prioritize speed over variety. Some setups are solo or two-person; others are feeding a family of five out of the same canopy.
What works for a weekend fishing trip out of a canopy isn’t the same as what works for a six-week cross-country overland trip with a rooftop tent and a full pantry. Building your kitchen around your actual travel habits, rather than a version of it you saw online, saves money and keeps you from hauling gear that never leaves the drawer.
A few questions worth sorting out first:
Do you mostly cook at the tailgate, or do you set up a separate outdoor kitchen station away from the vehicle?
How many people are you feeding, and how often are you resupplying?
Do you need something that packs up fast for quick highway stops, or a setup built for longer basecamp-style stays?
The Core Pieces of an Overland Camp Kitchen
Most setups that actually work share the same building blocks, even if the specific gear differs from rig to rig. Getting each piece right on its own is what separates a kitchen that functions from one that just takes up space.
Cooking Surface
A two-burner propane stove is still the go-to for most Canadian overlanders. It offers enough output for real cooking without the added fuel logistics of a bigger unit. Single-burner setups suit minimalist solo travel, while larger multi-burner stoves make more sense for basecamp trips where the vehicle stays parked for a few days at a time.
Wind matters more on Canadian trips than a lot of people plan for, especially along the coast or up in elevation through the Rockies. A stove with a built-in windscreen, or a fold-out screen you carry separately, saves you the headache of a burner that won’t stay lit.
Storage and Organization
This is where most camp kitchens break down, literally and otherwise. Loose totes shift in transit, lids crack, and finding one specific spice jar means unpacking everything else first.
A drawer-based storage system, whether it’s built into an aluminum canopy or added as a standalone modular unit, fixes most of this. Drawers sort gear by category, stay shut while you’re driving, and double as a flat, stable work surface once pulled out. For canopy owners especially, this is one of the better arguments for a proper drawer setup instead of stacked bins.
Slide-out kitchen units — units that mount inside a canopy or truck bed and pull out into a working counter and stove platform — have caught on for exactly this reason. They keep the whole cooking setup contained and protected from the elements while you’re driving, and ready to go in under a minute once you’ve stopped for the night.
Food and Water Storage
Cold storage isn’t optional for anything beyond a single overnight. A 12V compressor fridge has become the standard for serious overland builds because it holds a steady temperature no matter the outside conditions, unlike ice coolers that need regular resupply and leave meltwater that can wreck dry goods stored nearby.
Water storage should be sized realistically. A rough guideline is 3 to 4 litres per person, per day, for drinking, cooking, and basic cleanup — more if resupply along the route isn’t guaranteed. A secured water jug or built-in tank that’s easy to reach beats loose bottles rolling around the back every time.
Prep and Cleanup Space
A stable, flat prep surface is one of those things you don’t notice until it’s missing. Fold-out tables, tailgate extensions, or the pull-out counter on a slide-out kitchen unit all get the job done, as long as the height is workable and you’re not improvising a surface every single stop.
Cleanup is the step most trips shortchange, and it’s usually the one that causes headaches later. A dedicated wash basin, biodegradable soap, and a designated grey water container keep cleanup quick and stop food residue from drawing in wildlife, which matters a lot more across most of Canada’s backcountry than in a lot of other overlanding regions.
Building the Kitchen Around a Canopy
For rigs running an aluminum canopy, the canopy itself becomes the backbone of the whole kitchen setup. A few principles make a real difference:
Keep the heaviest, most-used items lowest and closest to the tailgate. Fridges, water jugs, and stoves get touched constantly and shouldn’t require digging past other gear to reach.
Lean on drawer systems instead of stacked totes wherever the canopy layout allows it. Drawers protect gear from vibration and weather better than most tote lids, and they make taking inventory easy at a glance.
Weatherproof anything that needs it. Canadian conditions can swing from dry heat to sudden rain fast, and gear living in an open canopy bed does better sealed up, even under a covered canopy.
Design around tailgate cooking specifically. Most camp kitchens end up centered on the tailgate as the main work surface, so it’s worth laying out storage so the stove, prep tools, and everyday food items are all within reach of that spot without extra unpacking.
Building the Kitchen Around a Rooftop Tent Setup
Rooftop tent rigs face a slightly different problem: less built-in canopy or bed space if the vehicle isn’t also running a canopy, and a kitchen that needs to stand fully on its own at ground level rather than being built into the vehicle.
For these builds, a dedicated kitchen box or chuck box that rides in the back and sets up independently at camp usually works better than trying to cram everything into the rig. It keeps the kitchen modular, lets you cook away from the vehicle if you want to, and doesn’t fight the sleeping system for space.
Ground-based kitchens also benefit from a solid table setup, since there’s no tailgate serving as a natural work surface the way there is on a canopy rig.
Seasonal Considerations for Canadian Trips
A camp kitchen dialed in for July in the Okanagan needs some tweaks for October in the Maritimes or a shoulder-season run through the Rockies.
Cold weather slows propane output, so packing a spare canister and keeping fuel from getting too cold overnight helps avoid a stove that struggles to boil water. Cold weather also cuts into fridge efficiency and battery draw, so a kitchen running off the same battery bank as your fridge and lighting needs a realistic power budget, especially on shorter winter days with less solar recovery.
Wet weather, which is close to a constant across most of coastal and central Canada, makes a fold-out awning or a simple tarp over the cooking area well worth the extra pack space. Cooking in the rain is manageable. Cooking in the rain with no cover over the stove tests everyone’s patience.
Common Mistakes That Undermine a Camp Kitchen
- Overpacking specialty gear that only gets used once. A well-stocked kitchen doesn’t need three sets of tongs.
- Underestimating water needs and ending up rationing cooking water on a trip that didn’t need to be that tight.
- Storing raw food and cooking gear together without separation, which turns into a bigger problem on longer trips with less frequent resupply.
- Skipping a real cleanup and grey water plan, which causes issues both with wildlife attraction and with keeping the rest of your storage clean.
- Not testing the full kitchen setup before a real trip. A stove that runs fine in the driveway can behave completely differently at elevation or in wind, and it’s better to find that out at home than three hours from the nearest town.
Getting the Setup Right the First Time
A good camp kitchen isn’t about buying the most gear. It’s about building a system that fits how you actually travel, works with the storage your rig already has, and holds up to the conditions you’ll actually run into across Canadian terrain and weather.
For rigs running an aluminum canopy, that usually starts with the storage system itself. A drawer-based canopy setup gives you the foundation to organize a kitchen properly instead of working around loose bins shifting on every rough road.
RooftopTents.ca offers aluminum canopies and rooftop tent setups built around exactly this kind of use, with configurations that support drawer systems, slide-out kitchen units, and the kind of organized storage that makes cooking on the road less of a chore. If you’re planning a build or figuring out how to fit a kitchen into your current setup, visit rooftoptents.ca to see canopy and tent configurations built for real overland use.